Key takeaways
- What causes it: Users often raise their desk until their forearms rest heavily on the surface, believing this extra support is beneficial. This is usually done while hunching forward.
- How to check: Stand at your desk and place your hands on your home row keys. Look in a mirror or have someone take a side-profile photo. If your shoulders are raised toward your ears, or if you feel tension in your upper trapezius muscles after 10 minutes of gaming, your desk is too high.
- What to do: Lower your desk in 0.5-inch (1.2 cm) increments using the manual down arrow on your controller pad. Stop when your shoulders drop into a natural, relaxed state and your elbows form a 90-to-100 degree angle. Note this new numeric value on your controller’s LED readout and save it to your standing preset.
- How to undo: If you find your wrists rubbing too hard against the desk edge, raise the desk by 0.2 inches (0.5 cm) until your forearms clear the edge, while keeping your shoulders relaxed.
For dedicated PC gamers, transition to a standing desk is often driven by a desire to improve posture, reduce fatigue, and maintain focus during long sessions. However, simply raising your desk until it feels “high enough” can severely compromise your mechanical execution. If your desk is off by even half an inch, your mouse tracking, wrist health, and aim consistency will suffer. Finding the optimal height settings for standing gaming desk configurations requires balancing ergonomic joint angles with physical control surfaces.
When configuring a standing gaming desk, you must prioritize structural stability, joint alignment, and consistent visual angles. In a standing position, your body lack the stabilizing support of a chair back and armrests. This shifts the burden of stabilization to your core, legs, and shoulder girdle. As we look at the premier PC gaming setups of 2026, dynamic ergonomics have shifted from a luxury to an absolute performance requirement. To maintain pixel-perfect precision in competitive titles, every component—from your mechanical keyboard’s plate height to your monitor’s tilt angle—must be calibrated as a unified system.
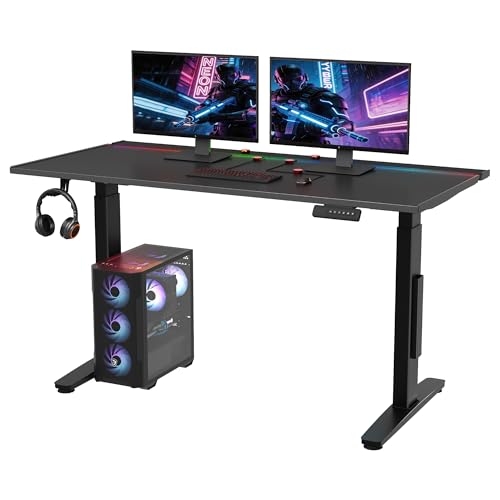
FLEXISPOT 55" RGB Electric Gaming Standing Desk, Magnetic Metal Desktop
Included for 'Optimal Height Settings for Standing Gaming Desk: Best Settings and Config' because the listing specifies Magnetic Metal Desktop, details this guide uses to compare options.
View on Amazon
FLEXISPOT E6G CyberX 63" RGB LED Electric Spacious Gaming Standing Desk
Included for 'Optimal Height Settings for Standing Gaming Desk: Best Settings and Config' as a relevant option in this category; details come from the product listing.
View on AmazonQuick Recommended Settings
Before diving into the fine-tuning process, use this baseline reference guide to establish your initial physical configuration. These values assume a standard flat-soled shoe or bare feet on a low-profile anti-fatigue mat.
| Setting | Recommended Value | Why |
|---|---|---|
| Standing Desk Height (Elbow-relative) | User Elbow Height minus 1.0 inch (2.5 cm) | Prevents shoulder shrugging, allows forearm support without creating pressure points on the ulnar nerve. |
| Monitor Top-Edge Height | Exactly at eye level (0 to 15-degree downward gaze to screen center) | Eliminates neck extension and compression; keeps the in-game crosshair in your primary field of view. |
| Keyboard/Mouse Surface Tilt | 0° (Flat) to -5° (Slight negative tilt away from you) | Prevents wrist extension (dorsiflexion) and reduces pressure inside the carpal tunnel during rapid mouse sweeps. |
| Monitor Viewing Distance | 20 to 30 inches (50.8 to 76.2 cm) | Reduces ciliary muscle strain in the eyes while maintaining full peripheral awareness of the HUD. |
| Cable Management Slack Loop | Minimum 18 inches (45.7 cm) of free-hanging loop | Prevents port damage, cable strain, or automatic system disconnections when transitioning from sitting to standing. |
Setting-by-Setting
Standing Desk Height
Exact Value: Floor-to-elbow height minus 1.0 inch (e.g., 42.5 inches / 108 cm for a 5’10” user).
To measure this, stand with your shoulders relaxed and bend your elbow at a 90-degree angle. Measure from the floor to the underside of your elbow. Subtract 1.0 inch from this measurement to set your desk height. This offset accounts for the height of your keyboard plate, keycaps, and mouse pad. Your forearms should rest parallel to the desk surface or tilt slightly downward at a 95-degree angle.
The Trade-off: Setting the desk higher provides more physical forearm support on the desktop, which can stabilize high-DPI wrist aiming. However, this raises your shoulders, compressing the brachial plexus nerves and causing shoulder strain over time. Setting the desk lower improves arm mobility for low-DPI arm-aiming sweeps but increases wrist friction on the edge of the desk, potentially leading to contact dermatitis or wrist fatigue.
Monitor Arm/Stand Elevation
Exact Value: 5.0 to 9.0 inches (12.7 to 22.8 cm) of vertical lift from the desk surface to the bottom of the monitor bezel (using an adjustable gas-spring arm).
Adjust your monitor arm so that the top third of your display panel aligns directly with your horizontal eye line. If you are using a 27-inch 1440p monitor, this typically means the center of the screen sits roughly 12 to 15 inches above your desk surface.
The Trade-off: A higher monitor elevation forces an upright head position, which minimizes neck muscle strain. However, it increases the exposed surface area of your eyes, leading to faster tear evaporation and dry-eye symptoms during intense gaming. A lower monitor position reduces eye dryness but forces a forward head tilt, adding up to 30 pounds of extra load to your cervical spine.
Monitor Tilt and Pitch Angle
Exact Value: 10 to 15 degrees of backward tilt (pitching the screen top backward away from you).
Adjust the monitor tilt joint (usually secured by a 4mm hex bolt on most gas-spring mounts) so the screen tilts back slightly. This ensures that your line of sight remains perpendicular to the glass surface of the monitor when looking down at your crosshair or mini-map.
The Trade-off: Backward tilt improves color accuracy and luminance uniformity on TN and VA panels, while keeping the entire display plane equidistant from your eyes. The trade-off is glare: tilting the screen upward makes it highly susceptible to reflecting overhead lighting fixtures, which can wash out contrast and cause visual fatigue.
Wrist Rest and Keyboard Profile Height
Exact Value: 0.75 to 1.25 inches (1.9 to 3.1 cm) profile height, paired with a flat or negative-tilt keyboard tray.
If you use a mechanical keyboard with high-profile keycaps (such as SA or OEM profiles), you must use a firm, non-compressing wrist rest (hardwood or high-density foam) that matches the height of your keyboard’s spacebar housing. Keep the keyboard legs collapsed so the board lies completely flat.
The Trade-off: A thick, firm wrist rest keeps your wrists straight, preventing carpal tunnel compression. However, it anchors your hand to a single pivot point. This is excellent for typing or playing MMOs, but it restricts the rapid, sweeping vertical mouse pulls required for recoil control in first-person shooters.
By Hardware Tier
Low Tier: Manual or Single-Motor Standing Desks
Low-tier desks typically feature manual hand cranks or basic single-motor lift systems with dual-stage legs. These frames often suffer from structural instability (wobble) when extended past 40 inches. Because these setups lack advanced programmable memory controllers, you must manually align the desk height every time you stand. To optimize this tier, adjust the hand crank until the desk surface aligns with your wrist joint when your arms hang loose at your sides. Use physical spacers, such as a wooden monitor riser block, to lift your stock monitor stand to eye level, as budget monitors rarely offer built-in height adjustments.
Mid Tier: Dual-Motor Desks with Programmable Controllers
Mid-tier setups utilize dual-motor, three-stage frames (such as the Uplift V2 or Fully Jarvis) capable of smooth, rapid adjustments. These frames feature digital control pads with programmable preset buttons (labeled 1, 2, 3, and 4 or S, 1, 2). Map your sitting height to Preset 1 and your standing height to Preset 2. Pair this frame with an independent, desk-mounted gas-spring monitor arm. This allows you to quickly adjust your monitor height relative to your desk when switching postures, compensating for the natural spinal decompression that occurs when standing.
High Tier: Integrated Smart Desks with Dynamic Mounting Systems
High-tier setups feature integrated power management columns (such as the Secretlab Magnus Pro) and heavy-duty, dynamic gas-spring or mechanical-spring monitor arms (like the Ergotron LX or HX series). These systems have built-in anti-collision sensitivity settings and ultra-precise millimetric height controllers. Connect your system cables through an integrated, underslung cable management tray that moves with the desk. This tier allows you to set precise presets down to the millimeter. You can adjust your standing preset to accommodate different footwear (e.g., Preset 2 for flat-soled shoes, Preset 3 for thick-soled running shoes or recovery slides).
Common Mistakes
Mistake 1: Desktop Height Configured Too High
- What causes it: Users often raise their desk until their forearms rest heavily on the surface, believing this extra support is beneficial. This is usually done while hunching forward.
- How to check: Stand at your desk and place your hands on your home row keys. Look in a mirror or have someone take a side-profile photo. If your shoulders are raised toward your ears, or if you feel tension in your upper trapezius muscles after 10 minutes of gaming, your desk is too high.
- What to do: Lower your desk in 0.5-inch (1.2 cm) increments using the manual down arrow on your controller pad. Stop when your shoulders drop into a natural, relaxed state and your elbows form a 90-to-100 degree angle. Note this new numeric value on your controller’s LED readout and save it to your standing preset.
- How to undo: If you find your wrists rubbing too hard against the desk edge, raise the desk by 0.2 inches (0.5 cm) until your forearms clear the edge, while keeping your shoulders relaxed.
Mistake 2: Insufficient Cable Management Slack
- What causes it: Routing and zip-tying cables (DisplayPort, USB, power cords) while the desk is in its lowest sitting position, without accounting for the vertical travel distance.
- How to check: Press your standing preset button. Watch your cables closely as the desk rises. If any cable becomes taut, pulls on a GPU port, or lifts your power strip off the floor before the desk reaches its destination, you have insufficient slack.
- What to do: Lower the desk immediately. Group your cables into a central bundle and house them inside a flexible cable spine or a braided wrap. Ensure there is a minimum of 18 inches of loose loop at the pivot point where the cables transition from the moving desk to the wall or floor. Secure the bundle to the underside of the desk frame using adhesive cable tie mounts.
- How to undo: If your cables are too short to allow a safe loop, you must purchase longer cables (e.g., switching from 6-foot to 10-foot DisplayPort 1.4/2.1 cables) or mount your power strip directly to the underside of the desktop.
Mistake 3: Locking Knees and Standing Static
- What causes it: Standing completely still on a hard floor surface (wood, tile, or thin carpet) for extended periods without moving your lower joints.
- How to check: Monitor your body during a gaming session. If you experience lower back stiffness, heel pain, or a dull ache in your calves within 30 minutes of standing, you are likely locking your knees.
- What to do: Place a high-density polyurethane anti-fatigue mat (minimum 3/4-inch thickness) beneath your desk. Stand with your feet shoulder-width apart and maintain a slight micro-bend in your knees to keep your leg muscles active. Shift your weight from side to side, or take a quick 1-minute walk around the room every 45 minutes.
- How to undo: If joint fatigue persists, transition back to your sitting preset by pressing your controller’s programmed sitting button. Limit your standing intervals to 30 or 45 minutes per session until your lower body adapts.
FAQ
How do I determine the exact standing desk height for my height?
To find your baseline height, put on the shoes you wear while gaming. Stand up straight with your shoulders relaxed and bend your elbows at a 90-degree angle, keeping your upper arms parallel to your torso. Measure the distance from the floor to the bottom of your elbow. Subtract 1.0 inch (2.5 cm) from this measurement to account for your keyboard and mouse pad. For example, if your elbow height is 44 inches, set your standing desk to 43 inches. Save this number to your desk’s memory controller.
Should I use a wrist rest when gaming at a standing desk?
This depends on your aiming style. If you are a high-DPI “wrist aimer” (relying on small, precise wrist movements), a slim, firm foam wrist rest can help prevent friction against the desk edge. However, if you are a low-DPI “arm aimer” (using large, sweeping arm movements across a massive mouse pad), do not use a wrist rest. A wrist rest anchors your arm, restricting the wide range of motion needed for large sweeps. Instead, lower your desk by an extra 0.5 inches so your forearm can slide smoothly across a large desk pad.
How does standing desk height affect my mouse aiming sensitivity (DPI)?
Standing shifts your center of gravity and changes how you leverage your shoulder and elbow joints. If your desk is set too high, your arm is forced upward, reducing your range of motion and making low-DPI arm aiming much harder. If you play competitive shooters at a low DPI (e.g., 400 to 800 DPI), lower your standing desk slightly (about 0.5 to 1.0 inch below elbow height). This gives your shoulder and elbow more leverage for fast, sweeping movements. If you play high-DPI games (1600+ DPI) that only require small wrist adjustments, keep the desk level with your elbow to maximize wrist stability.
My monitor wobbles when I use my standing desk. How do I fix this?
What causes it: Standing desks are naturally less stable when fully extended, as their center of gravity is higher. This instability can be worsened by loose joints on your monitor arm, uneven floor surfaces, or loose frame bolts.
How to check: Shake your desk gently or type aggressively. If your monitor wobbles, check if the movement is coming from the desk legs, the desk surface, or the monitor arm joints.
What to do: First, adjust the leveling feet at the bottom of your desk legs to ensure they make solid, even contact with the floor. If your desk is on carpet, use carpet cups or a hard plastic chair mat to stabilize the feet. Next, tighten the structural bolts on your desk frame using an Allen wrench. Finally, tighten the tilt and swivel tension screws on your monitor arm (usually located at the joints) using a 5mm or 6mm hex key until the arm is firm but still adjustable.
How to undo: If the monitor arm becomes too stiff to adjust, loosen the hex screws slightly (counterclockwise) by a quarter turn until you find the right balance of stability and adjustability.