Key takeaways
- Cap FPS just under max refresh: On a 240Hz panel, cap around 235 FPS to keep frames inside the sync window.
- Prefer DisplayPort: It’s the most consistent path for high-refresh adaptive sync across both brands.
- Enable in windowed mode too: If you game in borderless windowed, make sure the driver applies G-Sync to windowed apps.
- Update your GPU driver: Adaptive sync support and stability improve with each driver release, so keep current.
Screen tearing, that ugly horizontal split when the action gets fast, happens because your GPU and monitor aren’t in sync. Adaptive sync fixes it by letting the display refresh exactly when a new frame is ready, whether that’s 48 or 240 times a second. The result is buttery-smooth motion with no tearing and no input lag penalty, and nearly every gaming monitor sold in 2026, from the ASUS TUF Gaming VG259QM5A to the Samsung Odyssey OLED G5, ships with it built in.
The catch is that adaptive sync is often switched off by default, both in the monitor’s menu and in your GPU driver. This guide walks through enabling it end to end so you actually get the smooth experience your hardware is capable of, whichever brand of graphics card you own.
Our top picks
 ASUS TUF Gaming Series 5 24.5” 1080P
- High-Performance Display: 24.5-inch Full HD (1920x1080) Fast IPS…
- Ultra-Fast Response Time: ASUS Fast IPS technology enables…
- Adaptive Sync Technology: FreeSync Premium and G-Sync compatible…
 INNOCN 24.5" 1440P 240Hz Gaming Monitor Fast
- Super Fast IPS 1440p Gaming Monitor 240Hz &…
- High Image Quality QHD 1440P Computer Gaming Monitor:…
- HDMI + DisplayPort Connectivity: This INNOCN PC gaming…
| Product | Key specs | |
|---|---|---|
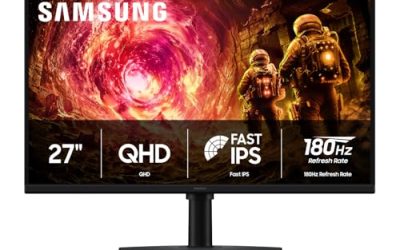
 Samsung 27” Odyssey OLED G5 Samsung 27” Odyssey OLED G5 | Check price | |
| ASUS TUF Gaming Series 5 24.5” 1080P | High-Performance Display: 24.5-inch Full HD (1920x1080) Fast IPS… Ultra-Fast Response Time: ASUS Fast IPS technology enables… Adaptive Sync Technology: FreeSync Premium and G-Sync compatible… | Check price |
| INNOCN 24.5" 1440P 240Hz Gaming Monitor Fast | Super Fast IPS 1440p Gaming Monitor 240Hz &… High Image Quality QHD 1440P Computer Gaming Monitor:… HDMI + DisplayPort Connectivity: This INNOCN PC gaming… | Check price |
 CUNPU 24 Inch 1080P 200Hz Gaming Monitor CUNPU 24 Inch 1080P 200Hz Gaming Monitor | Compact But Powerful Performance: Cunpu 24-inch gaming monitor… Fast IPS Visual Advantage: A New Generation of… Elite Gaming Performance: It is compatible with FREESYNC… | Check price |
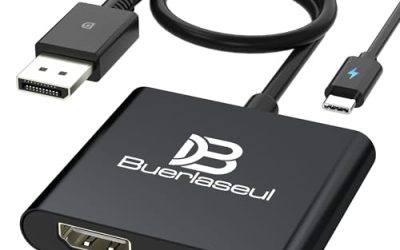
 Capshi 8K 4K DisplayPort Cable 1.4 Capshi 8K 4K DisplayPort Cable 1.4 | 8K DisplayPort Cable 1.4: This VESA Certified DP… Multi-functional Support: The 8K DisplayPort cable supports video… Advanced Technology: The cable delivers enhanced bandwidth via… | Check price |
| Capshi 8K 4K DisplayPort Cable 1.4 | 8K DisplayPort 1.4 Cable: This VESA Certified DP… Multi-functional Support: The 8K DisplayPort cable supports video… Advanced Technology: The cable delivers enhanced bandwidth via… | Check price |
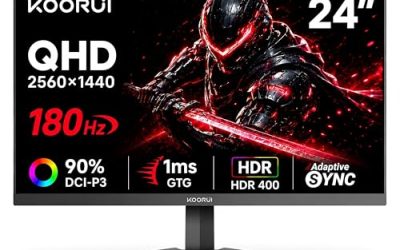
 KTC 32 Inch Curved Gaming Monitor KTC 32 Inch Curved Gaming Monitor | 【Clear Image Quality】32 inch curved monitor adopts VA… 【Excellent Color】Provides 350cd/m² brightness, 3000:1 dynamic contrast ratio… 【165Hz Gaming Monitor】Ultra-fast 165Hz refresh rate displays smooth… | Check price |
 KTC 27 Inch 240Hz Curved Gaming Monitor KTC 27 Inch 240Hz Curved Gaming Monitor | [Ultra-smooth 240Hz Refresh Rate] 240Hz refresh rate delivers… [More Immersive 1000R Curved Screen] The 1000R Curved… [Crysyal Visuals with 1440p Monitor] This 27 inch… | Check price |
As an Amazon Associate we earn from qualifying purchases at no extra cost to you.
⚡ Save on Your Next PC — Amazon Prime
Prime members get fast free shipping on the systems above, plus early access to Prime Day & Black Friday PC deals. New members get a 30-day free trial.
Watch: How to Enable G-Sync or FreeSync — Video Review
Understand What You’re Enabling
G-Sync is NVIDIA’s adaptive sync technology and FreeSync is AMD’s, but both work over the same VESA Adaptive-Sync standard on modern monitors, which is why a display like the ASUS TUF Gaming Series 5 VG259QM5A can be both “G-SYNC Compatible” and “FreeSync Premium” at once. Practically, that means an NVIDIA card enables the G-Sync path and an AMD card enables the FreeSync path on the very same monitor. Your job is simply to switch it on in two places: the monitor and the driver.
Turn It On in the Monitor Menu
Open your monitor’s on-screen display using the physical buttons or joystick, then look under a Gaming or Setup section for an entry called Adaptive-Sync, FreeSync, or G-Sync. Set it to On. Some panels, like certain KTC curved gaming monitors, keep this disabled out of the box, so a game may tear until you flip this single toggle. On monitors with multiple inputs, confirm the setting applies to the port you’re using.
Use a Cable and Port That Support It
Adaptive sync needs enough bandwidth, so use DisplayPort for the most reliable high-refresh experience. A VESA-certified cable such as a Capshi 8K DisplayPort 1.4 cord guarantees the link can carry 1440p or 1080p at high refresh with sync intact. HDMI 2.1 also supports adaptive sync, but older HDMI versions may cap refresh or drop the feature, so DisplayPort is the safe default for gaming.
Enable It in Your GPU Driver
On an NVIDIA card, open the NVIDIA App or Control Panel, go to Set up G-SYNC, tick “Enable G-SYNC, G-SYNC Compatible,” and choose whether it runs in fullscreen only or windowed too. On an AMD card, open Adrenalin software, open Gaming or Display settings, and switch AMD FreeSync to Enabled. After that, set your monitor to its highest refresh rate under Windows Display settings so the full adaptive range, often 48Hz up to 165Hz or 240Hz, is available.
Confirm It’s Actually Working
Launch a game with an uncapped or high frame rate and watch fast camera pans; tearing should vanish. Many monitors can display current refresh in their menu, and you can use a moving-line test pattern to verify smoothness. For best results, cap your in-game frame rate a few frames below your monitor’s max so you stay inside the adaptive range and avoid falling back to standard V-Sync.
Tips
- Cap FPS just under max refresh: On a 240Hz panel, cap around 235 FPS to keep frames inside the sync window.
- Prefer DisplayPort: It’s the most consistent path for high-refresh adaptive sync across both brands.
- Enable in windowed mode too: If you game in borderless windowed, make sure the driver applies G-Sync to windowed apps.
- Update your GPU driver: Adaptive sync support and stability improve with each driver release, so keep current.
Frequently Asked Questions
Can I use G-Sync on a FreeSync monitor?
Usually yes. Most FreeSync monitors are also G-Sync Compatible over DisplayPort, so an NVIDIA card can enable G-Sync on them from the driver. Monitors labeled both, like the VG259QM5A, are guaranteed to work.
Does adaptive sync add input lag?
No meaningful lag. Adaptive sync eliminates tearing without the latency penalty of traditional V-Sync, which is exactly why competitive players leave it on.
Why is my monitor still tearing after enabling it?
Check three things: the monitor menu toggle is On, the driver setting is enabled, and your frame rate is inside the adaptive range. Exceeding max refresh or using a weak HDMI link are the usual culprits.
Should I also enable V-Sync?
Many players leave driver-level V-Sync on alongside G-Sync as a safety net for when FPS exceeds the panel’s max, while capping FPS just below max. In-game V-Sync can be left off.
Conclusion
Enabling adaptive sync is a two-step affair: switch it on in the monitor menu, then enable G-Sync or FreeSync in your GPU driver, all over a solid DisplayPort cable. Do that, cap your frame rate just below the panel’s max, and screen tearing simply disappears. It’s one of the easiest, most impactful tweaks you can make to a modern gaming setup.