Key takeaways
- Measure your longest lens assembled. Include the hood, tripod foot, and protective cover.
- Pack your complete kit on a table. Add water, food, a jacket, binoculars, batteries, and a tripod plate.
- Check the internal compartment dimensions. Exterior litres do not reveal the usable camera length.
- Estimate the loaded weight. If the total approaches 25% of your body weight, prioritize a structured harness and hip belt.
- Test doorway and vehicle fit. A large 45–70L pack can be awkward in a small car or narrow hide.
- Inspect the access points. Zippers should be operable with cold or damp fingers, and dividers should hold lenses firmly without crushing them.
Best Camera Bags for Wildlife Photography in 2026
The best camera bag for wildlife photography is usually a comfortable, weather-resistant backpack with room for a camera body, a 100–500mm or 200–600mm lens, two or three smaller lenses, support accessories, and several hours of food and water. For most photographers, the strongest all-round choices are the Lowepro Pro Trekker BP 650 AW II for maximum capacity, the MindShift Gear BackLight Elite 45L for long hikes, the Shimoda Action X70 for modular organization, and the f-stop Tilopa when a lighter outdoor pack matters more than instant access.
Quick picks by shooting situation
| Wildlife photography situation | Best bag type or pick | Why it fits | Main compromise |
|---|---|---|---|
| Long hikes with a 100–500mm lens | MindShift BackLight Elite 45L | Load-bearing harness, rear access, substantial space for optics and layers | Heavier and bulkier than a daypack |
| Large telephoto kit or two camera bodies | Lowepro Pro Trekker BP 650 AW II | Deep camera compartment and generous accessory capacity | Too large for minimalist day trips |
| Changing lenses in dust, rain, or snow | Shimoda Action X70 | Modular core unit, wide opening, strong weather-oriented design | Camera insert capacity depends on the separately chosen core unit |
| Hiking where every gram matters | f-stop Tilopa with a suitable ICU | Outdoor-pack layout and customizable camera protection | Camera access is less immediate than a dedicated side-access bag |
| Short walks and fast access from a vehicle | Dedicated 20–30L telephoto backpack | Lower weight, simpler organization, faster access | Limited room for clothing, lunch, and a large support system |
What wildlife photographers should compare
Lens capacity: measure the longest item, not the camera body
A bag advertised as “large” may still fail to hold a professional telephoto lens with its hood reversed. Before buying, measure the camera-and-lens combination you actually carry, including the tripod collar, foot, lens cap, and any protective sleeve. A 100–500mm zoom is substantially easier to accommodate than a 200–600mm zoom, while a 400mm or 600mm prime may require a dedicated long-lens compartment.

K&F CONCEPT Camera Backpack, Lightweight Camera Bag with Tripod Holder
Included for 'Best Camera Bags for Wildlife Photography' because the listing specifies Lightweight Camera Bag with Tripod Holder, details this guide uses to compare options.
View on Amazon
K&F CONCEPT Camera Backpack, 20L Camera Bags for Photographers
Included for 'Best Camera Bags for Wildlife Photography' because the listing specifies 20L Camera Bags for Photographers, details this guide uses to compare options.
View on Amazon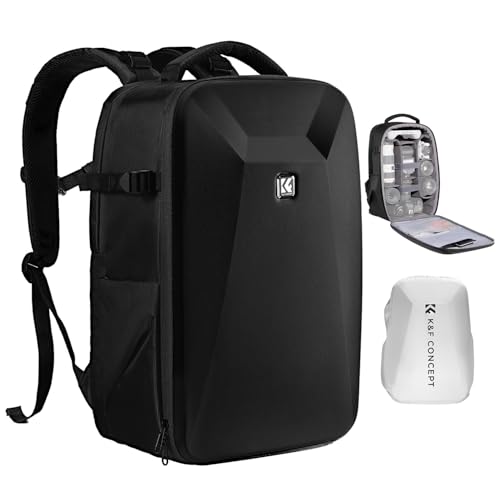
K&F CONCEPT Camera Backpack,Hardshell Photography DSLR Camera Bag
Included for 'Best Camera Bags for Wildlife Photography' because the listing specifies Hardshell Photography DSLR Camera Bag, details this guide uses to compare options.
View on Amazon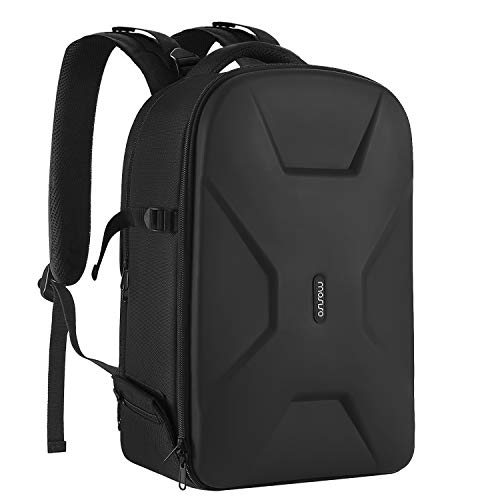
MOSISO Camera Backpack, DSLR/SLR/Mirrorless Photography Camera Bag
Included for 'Best Camera Bags for Wildlife Photography' because the listing specifies DSLR/SLR/Mirrorless Photography Camera Bag, details this guide uses to compare options.
View on AmazonFor a flexible wildlife kit, aim for approximately 30–45 litres: enough for one camera with a mounted telephoto lens, a second body, a wide-angle or standard zoom, binoculars, batteries, a rain shell, food, and water. A 20–25L pack can work for a camera, one telephoto zoom, and a few essentials, but it becomes cramped when you add a jacket or spotting scope. Photographers carrying a 500mm or 600mm prime should look for a bag with at least 40–50cm of usable interior length and a camera insert deep enough to protect the lens foot.
Weather protection: water-resistant is not waterproof
Wildlife work often means kneeling on wet ground, walking through brush, and leaving a bag beside a hide for hours. Look for coated exterior fabric, covered zippers, sealed or storm-flapped openings, and a built-in rain cover. The Lowepro Pro Trekker, MindShift BackLight, and Shimoda Action X ranges are designed with significant weather protection, but no padded camera backpack should be treated as permanently waterproof.
A rain cover protects the main shell but may not cover shoulder straps, hip belts, or the exposed underside. A dry bag or internal liner is useful for spare batteries, memory cards, and clothing. It also prevents a common failure: water reaching the camera compartment when the bag is placed on saturated ground.
Carry comfort matters more than empty-bag weight
Empty weight becomes important after several hours, but harness design determines whether that weight is tolerable. A useful wildlife pack should have a height-adjustable torso system, a sternum strap, a padded hip belt, and a frame or structured back panel that transfers some load to the hips. Shoulder-only camera bags are comfortable for short distances but tiring with a 4kg or heavier kit.
As a practical target, keep the fully loaded pack below roughly 20–25% of your body weight for a long day. For example, a 75kg photographer may find an 8–12kg load manageable, while a 15kg kit can become uncomfortable regardless of the brand. Weigh the complete setup at home, including water, tripod, binoculars, and rainwear; manufacturers normally list only the empty bag.
Head-to-head: four strong wildlife backpack designs
Lowepro Pro Trekker BP 650 AW II: maximum capacity
The Pro Trekker BP 650 AW II suits photographers who carry a large telephoto, multiple bodies, a drone or flash system, and substantial personal gear. Its generous internal volume makes it easier to separate camera equipment from clothing and food, and Lowepro’s All Weather cover adds useful protection during changing conditions.
Choose it when capacity is the deciding factor, especially for vehicle-based trips, multi-day excursions, or professional kits. Its weaknesses are bulk and weight: a fully loaded pack can become cumbersome in narrow trails, and the large profile may be excessive for a short walk with one zoom lens.
MindShift Gear BackLight Elite 45L: best for long outdoor days
The BackLight Elite 45L is aimed at photographers who need a serious hiking harness as well as camera protection. Rear-panel camera access keeps the padded compartment away from mud when the pack is placed down, while the main compartment leaves space for outdoor equipment and layers.
It is a particularly sensible choice for long hikes, cold-weather clothing, and photographers who prefer to remove the pack before opening the camera section. The trade-off is access speed: reaching the camera generally takes longer than using a side-access bag while the pack is still on one shoulder.
Shimoda Action X70: best modular system
The Action X70 is a good fit when one day involves a camera kit and the next involves climbing, camping, or a large amount of personal equipment. Shimoda’s modular design uses removable camera core units, so capacity and layout depend on the insert selected. That flexibility is valuable, but it means the bag should be judged as a system rather than by the outer volume alone.
The wide opening and weather-conscious construction make it practical for fast changes in exposed locations. It remains a large pack, however, and its best performance comes when the harness is adjusted to the photographer’s torso rather than simply tightened at the shoulders.
f-stop Tilopa: best for a lighter outdoor-pack approach
The Tilopa combines a technical hiking-pack format with a removable Internal Camera Unit. This allows the same outer pack to be used for camera work, travel, or general outdoor equipment. It is appealing when weight distribution and customizable packing matter more than dedicated wildlife-specific access.
The main limitation is speed. Depending on the insert and packing arrangement, you may need to put the bag down and open it fully before changing lenses. It is better for deliberate shooting from a hide, trail, or overlook than for rapid reaction photography from a moving vehicle.
Real-world size and weight comparison
| Pack class | Typical empty weight | Useful capacity | Practical wildlife load | Best use |
|---|---|---|---|---|
| Compact telephoto pack | 1.2–1.8kg | 20–25L | Camera, 100–500mm, one small lens, water, light jacket | Short walks and local reserves |
| Mid-size outdoor camera pack | 1.8–2.5kg | 28–35L | One or two bodies, telephoto zoom, two small lenses, lunch, rainwear | Most full-day outings |
| Large wildlife backpack | 2.3–3.5kg | 40–50L | Long lens, spare body, binoculars, tripod, layers, 2L water | Long hikes and specialist kits |
| Extra-large expedition pack | 3kg or more | 50–70L | Large prime lens, extensive clothing, support equipment, camping items | Remote or multi-day assignments |
Access speed versus protection
Side access is fastest when a bird suddenly appears: you can swing the pack forward and retrieve the camera without fully removing it. The disadvantage is that the side opening places more strain on one shoulder and can expose equipment while the bag is being moved.
Rear access is slower but cleaner and safer in wet or muddy conditions. It also makes it harder for equipment to fall out when the pack is opened. Top access is convenient for a camera with a mounted lens, but it may provide less organized separation between camera gear and personal items.
For fast-moving wildlife, prioritize side or top access. For wetland walks, forest hikes, and locations where the bag will repeatedly touch the ground, rear access is often the better compromise.
How to choose the right bag before buying
- Measure your longest lens assembled. Include the hood, tripod foot, and protective cover.
- Pack your complete kit on a table. Add water, food, a jacket, binoculars, batteries, and a tripod plate.
- Check the internal compartment dimensions. Exterior litres do not reveal the usable camera length.
- Estimate the loaded weight. If the total approaches 25% of your body weight, prioritize a structured harness and hip belt.
- Test doorway and vehicle fit. A large 45–70L pack can be awkward in a small car or narrow hide.
- Inspect the access points. Zippers should be operable with cold or damp fingers, and dividers should hold lenses firmly without crushing them.
Final recommendation
For the widest range of wildlife assignments, choose a 30–45L backpack with a genuine hip belt, rain cover, rear or side camera access, and enough length for your largest lens. Pick the Lowepro Pro Trekker BP 650 AW II when capacity matters most, the MindShift BackLight Elite 45L for sustained hiking comfort, the Shimoda Action X70 for modular outdoor use, and the f-stop Tilopa for a customizable, hiking-oriented setup. The right bag is not the one with the largest litre figure; it is the one that protects the longest lens while keeping the complete loaded system comfortable and accessible for the entire shoot.